
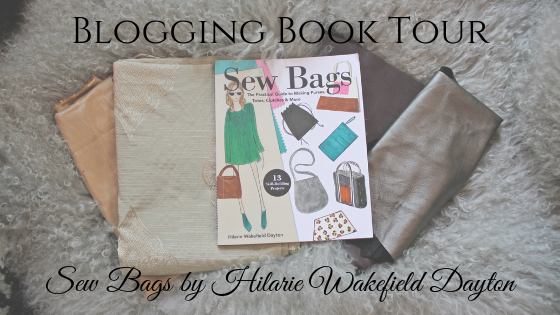
I have never heard of a Blogging Book tour before. Have you? When my friend & Colleague, Hillary Wakefield Dayton, told me she was having one for her new book, “Sew Bags” The Practical Guide to Making Purses, Totes, Clutches and More, I was intrigued. She sent her book to me to review and make a project from, so now I’m blogging about & you can see inside this awesome creation of hers.
Thumbing through the pages, it was difficult to choose which pattern to pick, but Ultimately, I landed on the Abigail Boxed bottom Tote. I really needed a new & prettier knitting bag, as I’ve been using a cotton canvas grocery bag for the last few years.

At 11” wide, 13 3/4” tall and 4” deep, this bag was the perfect size for knitting projects and would fulfill the “Pretty” aspect I was going for. The book calls for canvas and kraft-tex, which fees like a paper-leather hybrid.
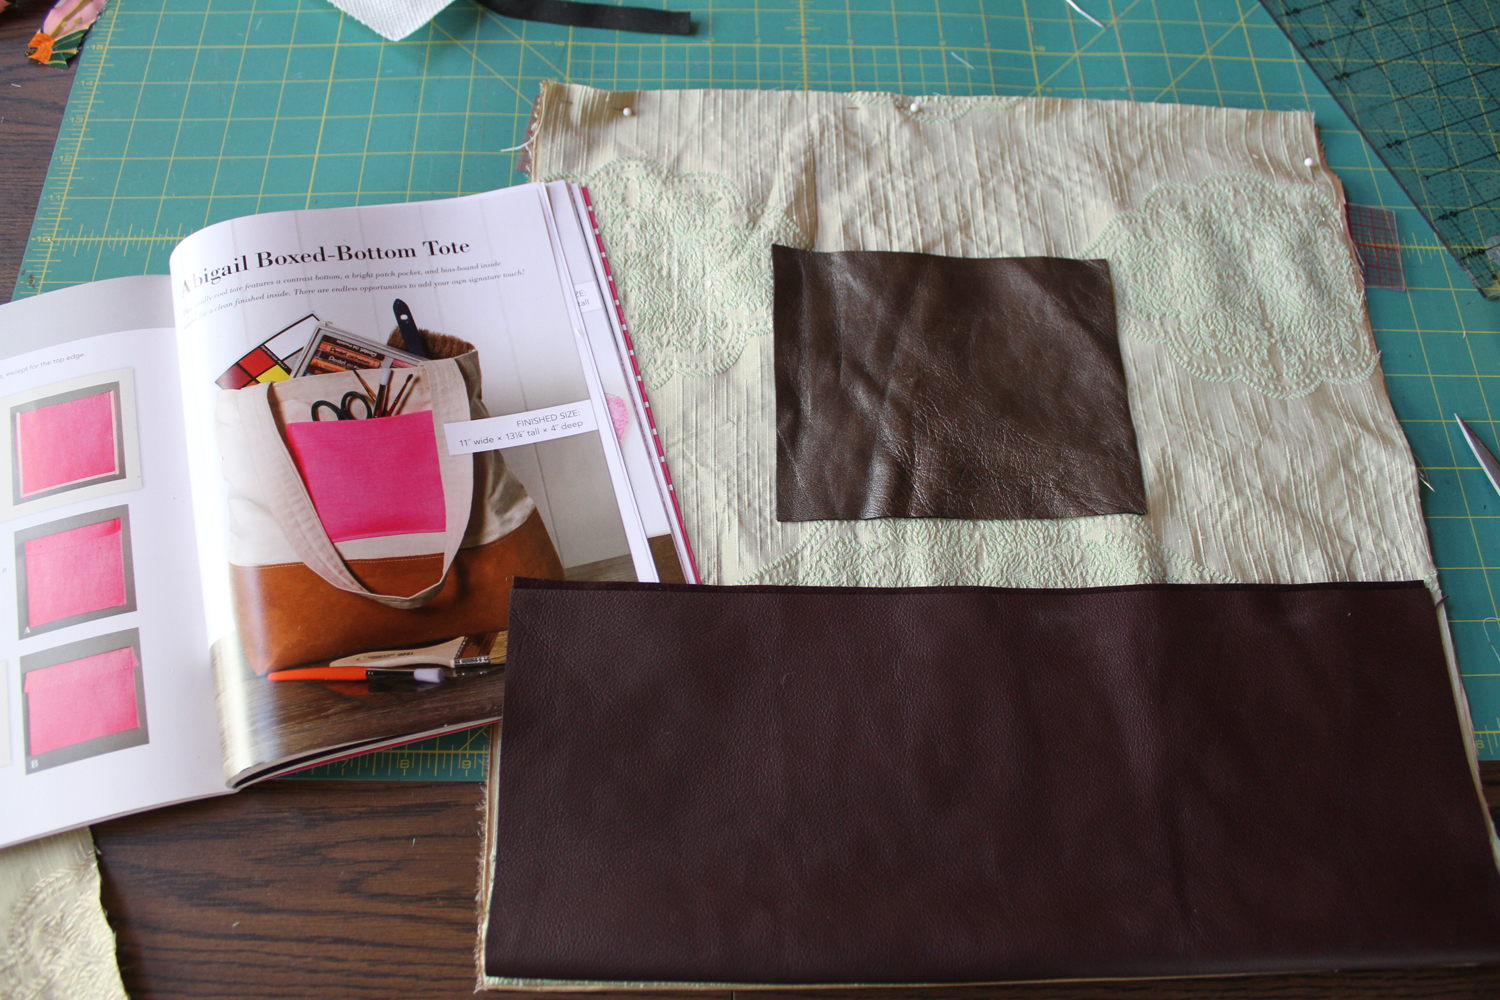
The fabric I chose, however was a silk upholstery sample and some leather scraps that were donated to the shop. I used all materials I had on hand as there is more than enough in my stash. I figured the kraft-tex and leather would likely behave the same.

In her book, Hilarie suggests using Wonder Clips to secure for sewing kraft-tex/leather. I did not follow her suggestion, only because I was sewing rogue on a Sewing Vacation with my best friend. We brought supplies, however, I did not read through my direction beforehand to see that as an option. Note to self - READ DIRECTIONS before collecting materials and embarking on a project, off in the wilderness.
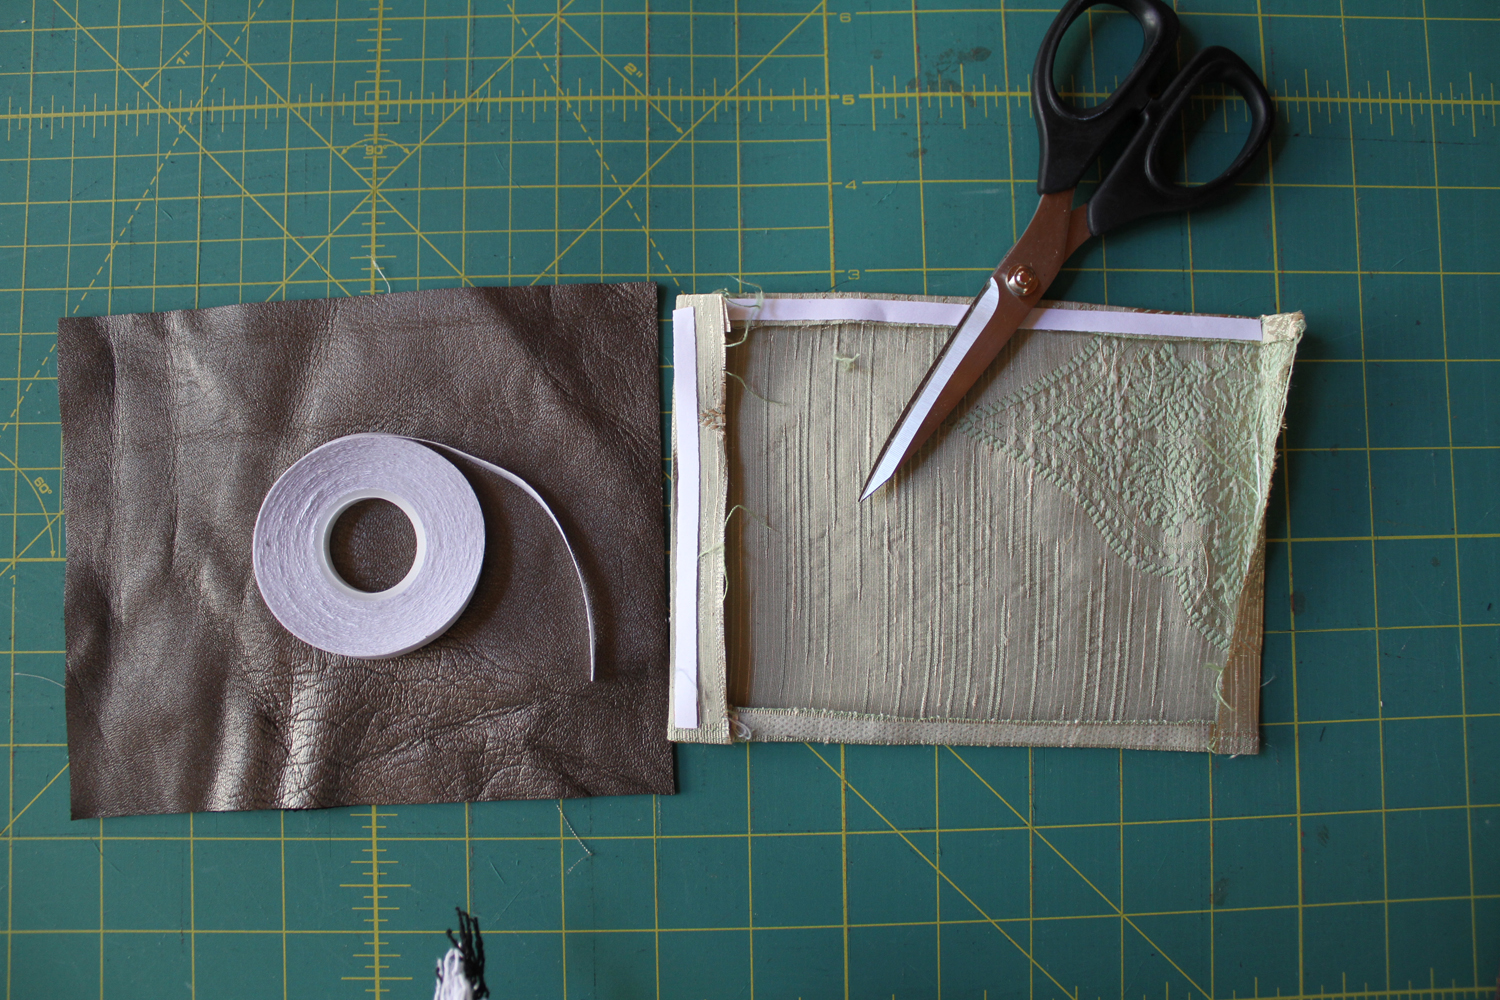
My solution, was to raid my friend Angie’s stash of supplies. I found her Wonder Under tape. I used this to secure the lining to the back of the leather pocket , after folding back the seam allowance. It held the to edges together beautifully while I stitched the top edges together.


Here you can see the pocket from the back side.


I used the Wonder Under again on the leather Square that will serve as the bottom of the back, when finished. I needed to sew it to the center of the rectangle that serves as the main bag. All you have to do is press the tape on and peel off the paper, then press your prepared piece onto another piece of fabric to secure the two together. You don’t have to use pins. So cool.


Before sewing the leather onto the main bag piece, I chose to interline my bag with a silk taffeta. I put the two pieces together and hand stitched all the way around to hold the pieces together.

My next step was to sew the leather piece onto the main bag panel in the center. The wonder under helped, however, the fabrics and leather did not like working together. They slipped a bit when stitching, but it worked out in the end.

I placed the pocket and stitched it on, above the leather panel.


The pattern suggested using bias trim in a contrast color to add interest and to cover the side seams after they were sewing together. I had extra fabric, so I cut strips and sewed them on just like binding. It was beautiful finish and super easy.

The corners are boxed corners which I then trimmed and bound just like the side seams. Because of the thickness, however, the final stitching had to be done by hand. My machine wasn’t having any of it.

The bag handles & top hem were finished just like the book suggested. Both were easy to do and explained well in the book.
Overall, I really liked the book. All of the projects were fairly easy and each one used different techniques, that gave the bag a professional finish. One of my favorite parts of the book, however, was the section where Hilarie writes about learning ”How to think like a designer”. She gives several exercises that help spur one’s creativity. Bravo Hilarie! Job well don.
If you are interested in purchasing her book, you can find it by clicking this link:
“Sew Bags” The Practical Guide to Making Purses, Totes, Clutches and More,

I’d like to thank my dear friend Angie for letting me use her materials and for joining me in Arnold for a fabulous sewing weekend. And also for the pretty silk upholstery sample I used for my bag. Doesn’t she look cute in the new top she made, while we were there? It’s made from Pendleton Silk (Portland collection) using the Sew House Seven - Tea House Top & Dress Pattern..
I’d also like the thank the Casa Azul Cabin for their Hospitality and whimsical vintage setting. You really should go there if you get the chance.
Until Next Time, Happy Sewing!
xo - Jennifer
